Are you navigating the world of Modern Authentication in your company? Let's dive into how Azure Active Directory (AAD) app registration can be your ticket for seamless authentication and authorization.
Azure AD App Registration: 'Entra' a New Era
Ah, the world of Azure AD App Registration - a realm where some dare not go in… But wait, there's a plot twist! Enter Microsoft Entra ID, the new protagonist on stage, with changes to the Azure AD App Registration narrative. Microsoft says it is the next evolution of identity and access management solutions for the cloud. If you want to delve in to see what's new, Microsoft has available free training. If you just want to enter the realm to register your app… follow me!
Azure AD App Registration: Two step-by-step scenarios
Depending on the software, the procedure might be a bit different. In this tutorial, we will cover the two options we use at Connecting Software:
- Client Credentials Grant (via certificate)
- Authorization Code Grant (via client secret)
Please note that if you are reading this article because you are starting with a Connecting Software product, you should follow these instructions only if you are deploying the software on-premises. For SaaS, you can use the app we’ll provide you and you’ll only need the directory id, or you can create your own app.
In any case, let’s get started!
Client Credentials Grant
We’ll first go through the Client Credentials Grant (CCG) procedure, sometimes referred to as implicit grant. Here are the steps you’ll need to follow:
CCG1 - Open the Azure portal, log in, and select the Microsoft Entra ID

Alternatively, you can come in through the Microsoft Entra admin center and select Microsoft Entra ID (Azure AD).
CCG2 - Select App registrations.
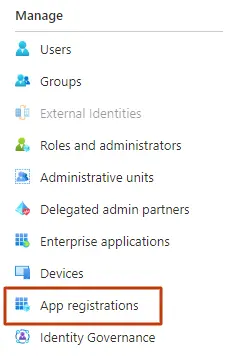
If you came in through the Microsoft Entra Admin Center, you’ll find the App registrations under Applications.
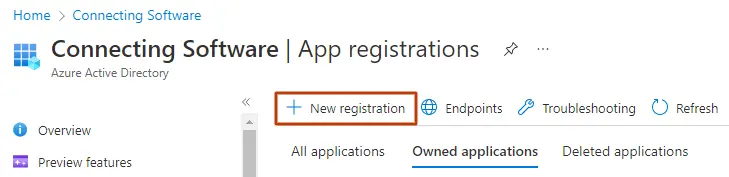
CCG3 - Select New registration.
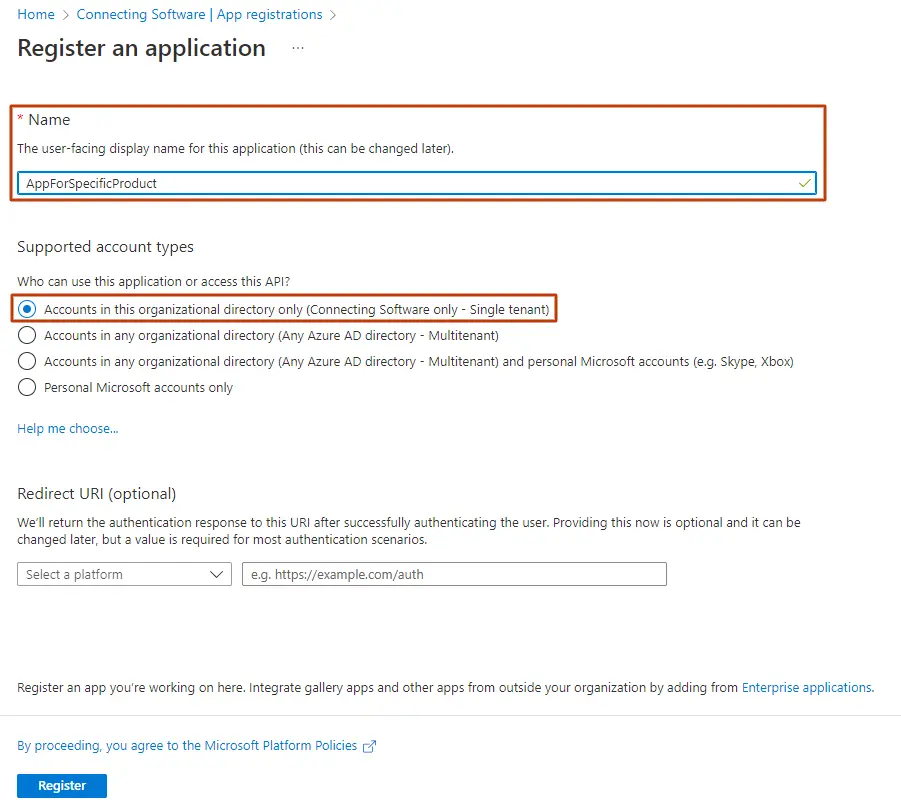
CCG4 - Type your application’s name, choose the account types and click Register. Please note that the Redirect URI is optional, but necessary in most of the scenarios.
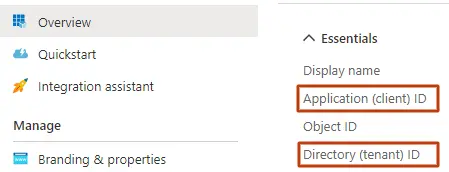
CCG5 - Copy your Application (client) ID and Directory (tenant) ID as you will need to enter these in the software you are setting up Modern Authentication in.
CCG6 - You will need to get the certificate from the software you are doing Modern Authentication for. As an example, if it is Document Extractor on-premises you can go to the configuration page, download the certificate from the Public Key Certificate field. In other cases, you will find it in the Certificate field.
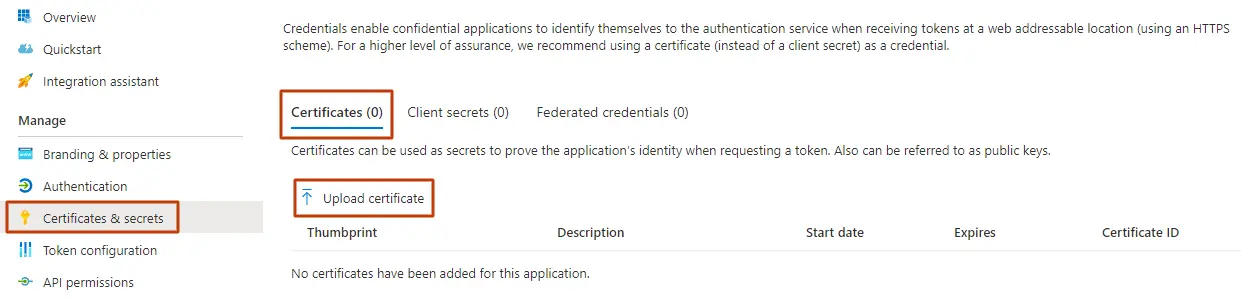
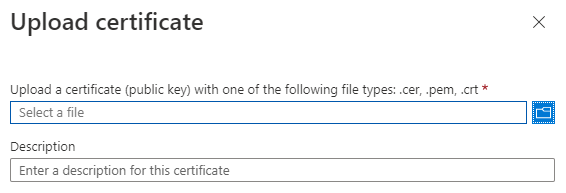
CCG7 - You will now upload this certificate in Azure. Click Certificates and secrets, then Certificates, and finally, Upload certificate.
CCG8 - Upload the certificate which you downloaded earlier and click Add.
Once uploaded, you should see the certificate in the list, with its Thumbprint, Start date and an indication of when it Expires
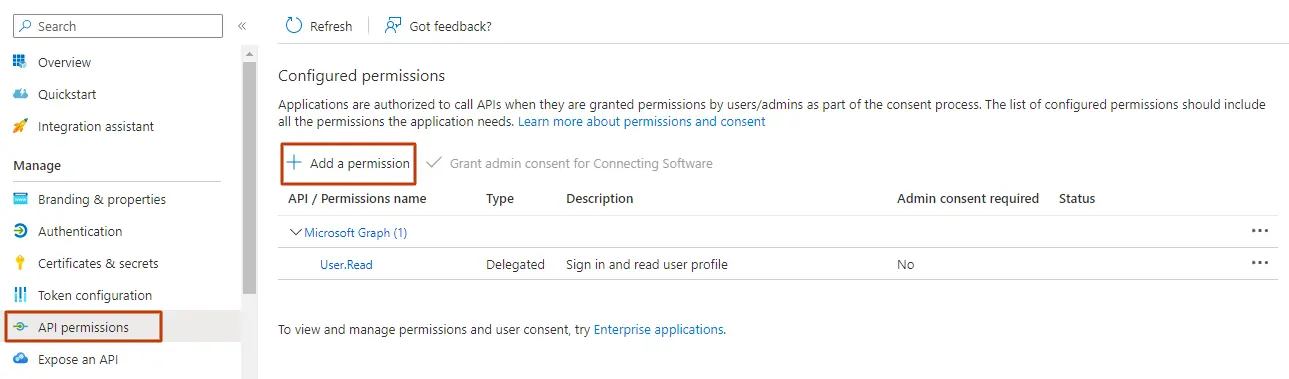
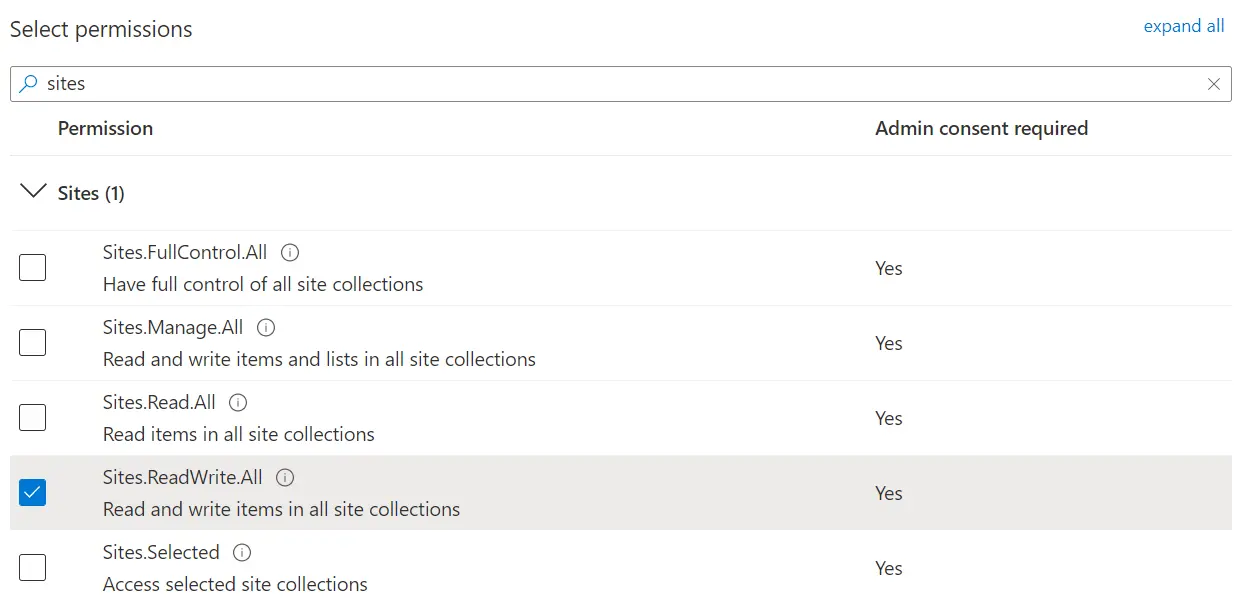
CCG9 - Click API permissions and then click on Add a permission
CCG10 - Select SharePoint and choose Application permissions
CCG11 - The permissions you will need to check will depend on the software you are creating the app for and also on your specific use case for it.
This will differ from product to product but, for example, for Document Extractor you would normally check the “Sites.ReadWrite.All” permission, but if you would like to sync changes from SharePoint to Salesforce then you would check the “Sites.Manage.All” permission instead.
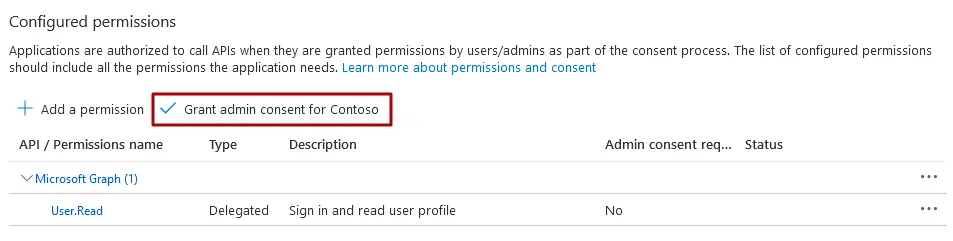
CCG12 - As a final step you should grant admin consent. You’ll find the Grant admin consent for … button next to the Add a permission button that you used in the previous step. If the Grant admin consent for … is disabled, check which user are you logged in with.
Authorization Code Grant
For this other type of grant, the first steps are identical and then the procedure takes a different path:
ACG1 - Identical to CCG1
ACG2 - Identical to CCG2
ACG3 - Identical to CCG3
ACG4 - Besides typing your application’s name and choosing the account types, you’ll need to select a platform - select Web - and then enter the redirect URI.
For example, for CB Dynamics 365 to SharePoint Permissions Replicator, it should be https://permissions-replicator-saas.connecting-software.com/consent-callback.
Once that is done, click on Register.
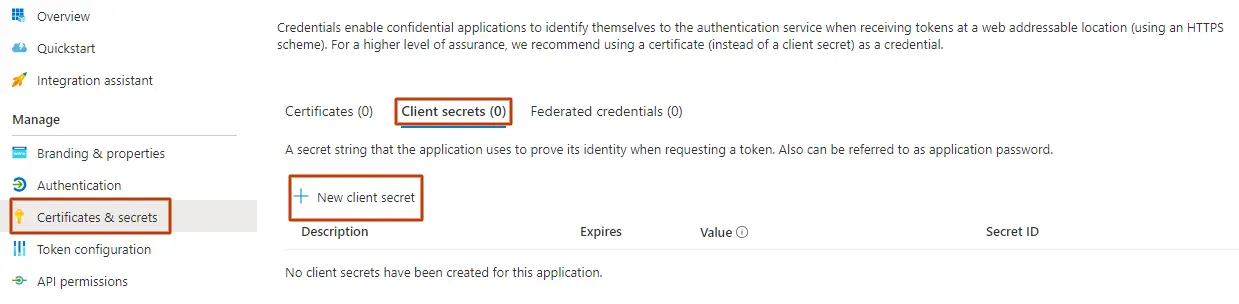
ACG5 - In the Certificates & secrets section, go to Client secrets and click New client secret. Copy the generated secret so you can use it in the next steps.
ACG6 - Identical to CCG9
ACG7 - Identical to CCG10
ACG8 - Identical to CCG11
ACG9 - Identical to CCG12
Conclusion
In this article, we’ve walked you through the two options we use for Azure AD App Registration at Connecting Software: Client Credentials Grant (via certificate) and Authorization Code Grant (via client secret).
About the Author

By Ana Neto, technical advisor at Connecting Software.
“I have been a software engineer since 1997, with a more recent love for writing and public speaking. Do you have any questions or comments about this article? I would love to have your feedback, leave a comment below!"